
When devices are imported, they are listed under the Master Lookup Table. Clicking any device (plotted device or the device on the Master Lookup Table) displays the Asset Property window with all the associated properties. Device properties are derived from the imported fleet data and auto-populate the Basic and Advanced tabs based on the make and model provided. The make and model of the imported device is mapped to the Original Make and Original Model fields, and the corresponding device data set matched make and model of the devices is auto-populated in the Make and Model fields.
Details can also be entered for the devices that are plotted manually. Properties updated for a manually plotted device can be seen under the Master Lookup Table, only when the In Scope + Plotted filters are selected.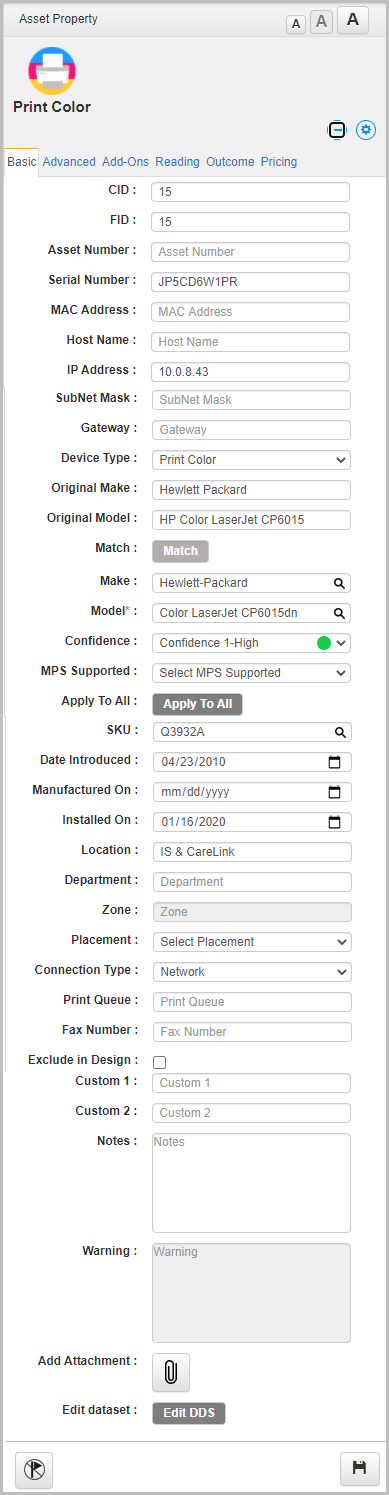
The Asset Property window includes six tabs:
| Name | Purpose |
| Basic | Displays the general information about a device. |
| Advanced | Displays more advanced options available for an device. |
| Add-ons | Displays the accessories, solutions and services related to an device. |
| Reading | Displays the periodic device readings generated through the DCA tool. Enables the Fleet Designer to find the total number of mono and color pages available on a printer. |
| Outcome |
Outcome Intent – Allows the Fleet Designer to select an outcome intent in any state for the device. The intents can be selected from the drop-down. You can either retain the outcome intent selected by the Fleet Designer or suggest a new one.
|
| Pricing | Pricing information is required to determine the cost efficiency of the devices and showcase the fleet design as per the cost data. For more details see Pricing. |
Also, the configuration received from individual printers can be uploaded through the Add Attachment option under the Basic tab in the Asset Properties window.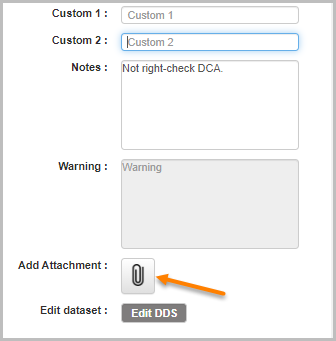
To add an attachment, click ![]() . The Upload Files pop-up window appears. Click the Choose File button to select a file and click the Attach button. You can also add multiple files .
. The Upload Files pop-up window appears. Click the Choose File button to select a file and click the Attach button. You can also add multiple files .
You can also provide description about a particular file, which is optional.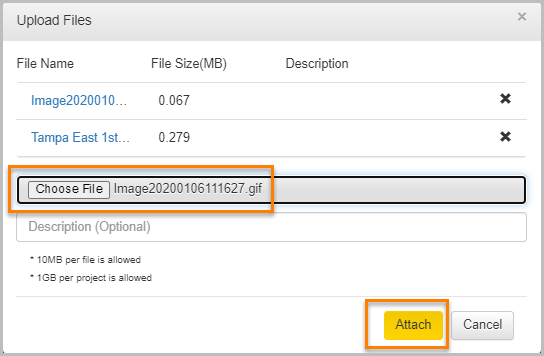
An attachment can be downloaded and viewed by clicking on a particular file. Any unwanted file uploads can be deleted.
The maximum file upload size should not exceed 10 MB/file and 1GB/project. Supported file formats are listed here.
To view the Asset Property window in the tabular view, click the device name (under the level column). The Asset Property window can be seen just as the same way as seen for the normal floor map view.